
Digital Marketing thrives on data, no matter what type of site you have, whether it is an eCommerce site or a personal website, it is important to understand how users interact with your site. By using Google Tag Manager in conjunction with Google Analytics, you are able to collect a lot more data. This blog discusses everything you need to know about Google Tag Manager which will open up a whole new world of possibilities.
Google Tag Manager, What is it And Why Do You Need it?
In 2012 Google announced the release of powerful and ground-breaking tool known as Google Tag Manager. Not only is it a great tool but it is still under-utilised by many, it’s free and allows you to easily update things like your Analytics Code (or tags) with a few simple clicks and without the need for developer intervention or programming knowledge.
These ‘tags’ are the snippets of code that are added to your site in order to collect information, in this day and age, most websites use several different tags in order to collect the information that is relevant to their marketing campaigns and it is this bit that is quite often overwhelming or requires your developer.
Google Tag Manager simplifies this by providing a user-friendly interface that allows you to add, edit and disable tags without the need for accessing the direct source code of your website.
It makes this achievable by utilising a container which sits within your source code and then allows you to work on the tags within this container. Although designed to reduce the reliance on a web developer it will still need some technical knowledge to be able to implement the initial setup. However, once setup it has numerous templates that allow non-developers to implement many useful tags. Should you need more complex tags these can still be created if you have an understanding of coding or someone that can do this for you.
Implementing Google Tag Manager
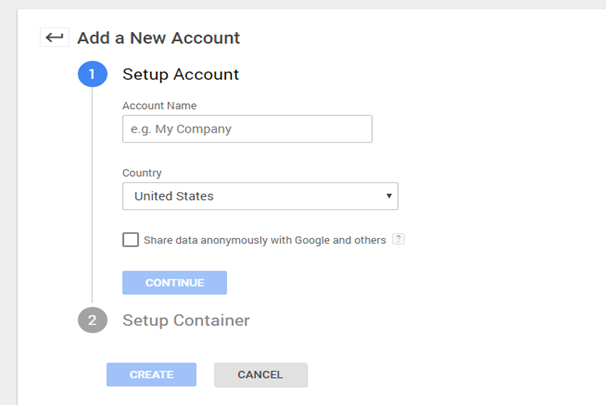
The first thing that you will need to do is create an account and sign up for Google Tag Manager.
To create a new account you will need to add an account name in the Account Name field as shown below, select the relevant Country from the drop down and then click Continue.
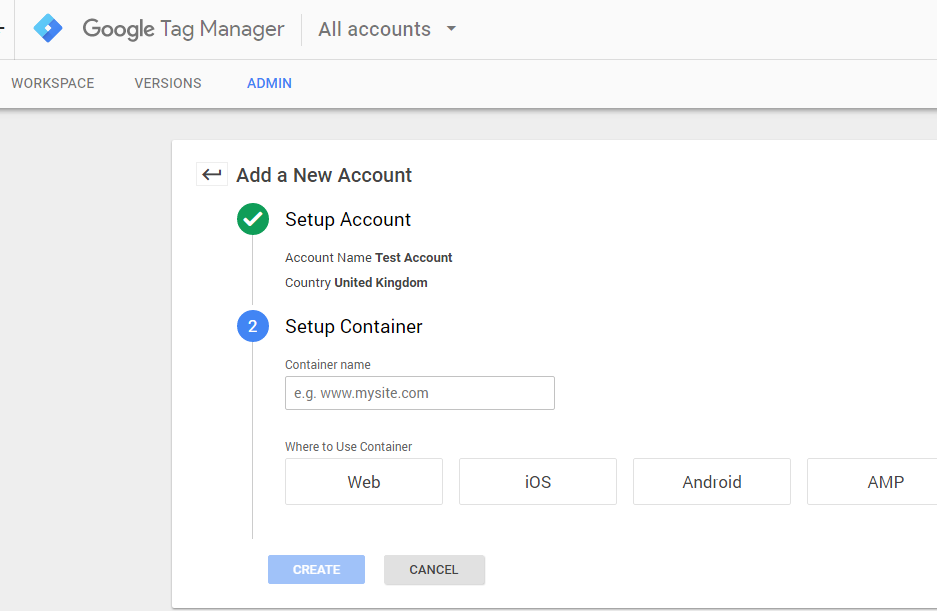
In the next screen Setup Container, enter your website name as the Container name. Under Where to Use Container, choose Web and then, click Create.
After agreeing to the terms and conditions (which includes new GDPR acceptance) you will be provided with the necessary code for adding the Tag Manager container to your website which will look like that seen in the screenshot below.
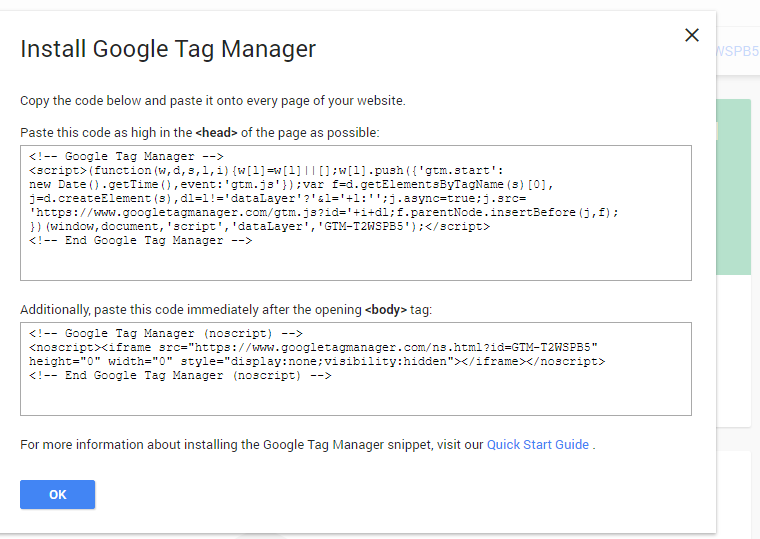
For more information about installing the Google Tag Manager snippet, visit the Quick Start Guide . This is the section where you may still need your developer to assist.
Add Your First Tag
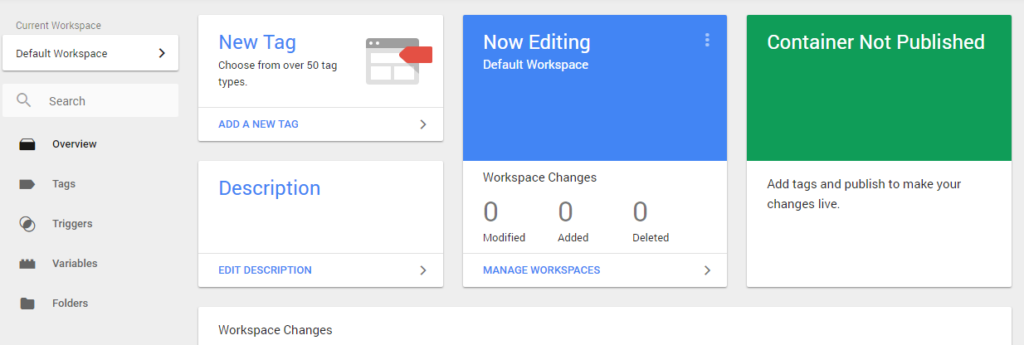
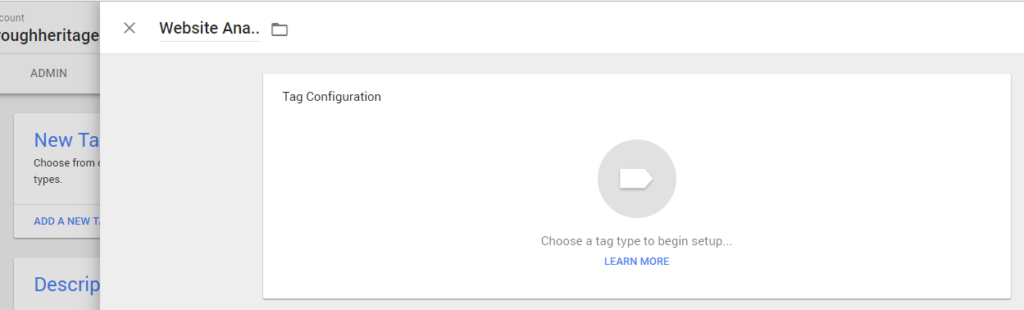
Once your code has been implemented on the website you are ready to create your first tag, from the screen shown below select New Tag.
In the field that currently says Untitled Tag give your new tag a meaningful name, so if you are setting up analytics for example call it yoursite analytics after this click in the box called Tag Configuration which will call a pop out menu from the side called Choose tag type.
From this pop out menu choose the option Universal Analytics and then fill out the following options in the new form that appears. As this is the first time of adding anything for our new analytics we will select Page View as the track type.
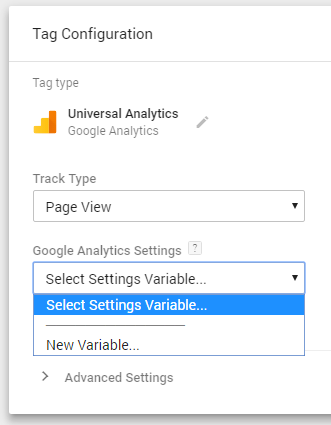
Under Google Analytics Settings click the drop down box and select New Variable Google Analytics Settings variables enable you to easily use and maintain settings across tags. You may configure settings for this tag independently by checking the override checkbox below. If you don’t select a Settings variable, you must set your Tracking ID via the override settings.
On the following screen you will see a box where you can paste your Google Analytics Tracking ID. To find the tracking ID:
Sign in to your Analytics account.
Click Admin.
Select an account from the menu in the ACCOUNT column.
Select a property from the menu in the PROPERTY column.
Under PROPERTY, click Tracking Info > Tracking Code. Your tracking ID is displayed at the top of the page.
You will also see in this section an option to add more settings, for the purpose of this article we will just add eCommerce, click the drop-down and then tick Enable Enhanced eCommerce Features and then tick Use Data Layer. We may come back and discuss the other options in a future post. Once you have done all this just click Save and in the Rename Variable box give the variable a meaningful name.
You will now be returned to one of the previous screens where you can set the triggering for your tag. Click on the big icon where it says choose a trigger to make this tag fire. For a basic Google Analytics implementation, select All Pages.
Congratulations, you have just created your first basic Analytics setup to track all pages of your website using Tag Manager.
Preview and Publish
Once you have successfully created your new tag we still need to publish this to the web, however it is better to check that this is working as you would expect before actually publishing this to the live site.
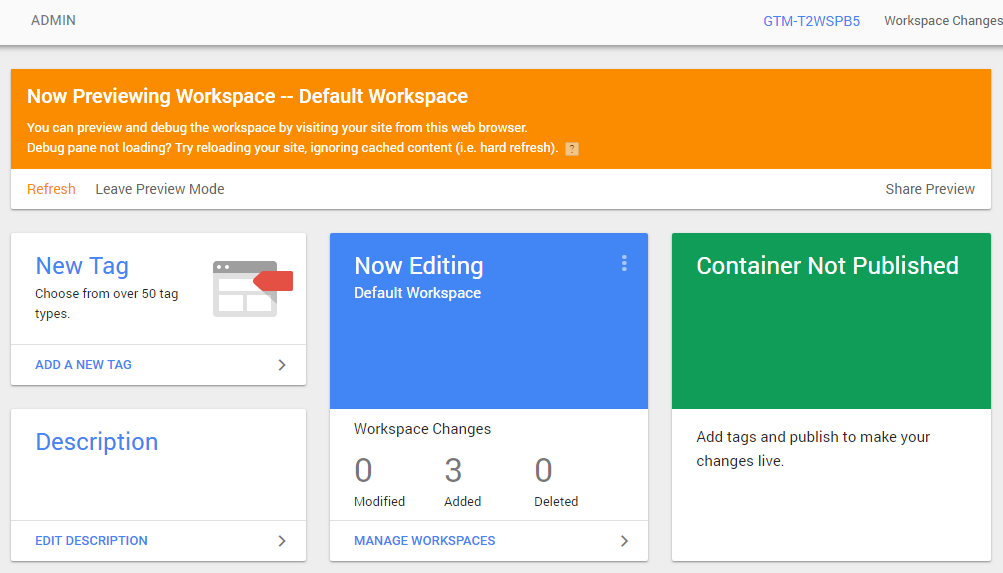
This is accomplished by utilising the Preview & Debug mode of Tag Manager, From the Workspace homepage in Tag Manager click the Preview button in the top right corner, the screen will then change to look like this.
And if you now go to your live website you will see that the debug window has appeared at the bottom of the screen as shown in the image below.
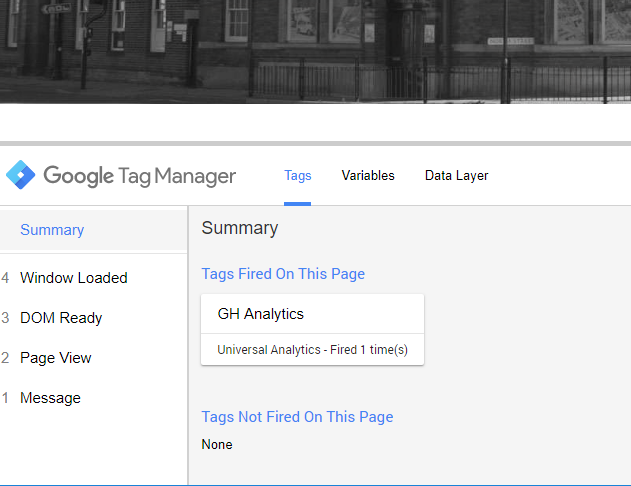
You can see in the image above that our new tag has fired correctly on the page as it is reporting that the tag called GH Analytics has fired Universal Analytics 1 time, you should check this on several other pages before returning to Tag Manager to deploy this on the live site.
To deploy the new tag or any changes you may have made to any other tag to the live site click the Submit button, next to the Preview button mentioned earlier, then fill in the details for Version Name and if you like add a description of what you have done.
There are now a couple of things you can do to check that Tag Manager is reporting correctly.
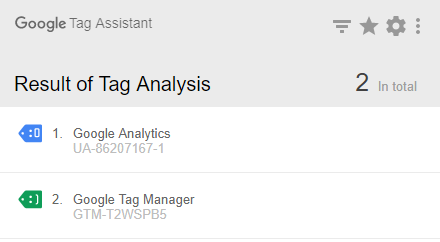
The first if you are using the Google Chrome Browser is to add the Chrome Extension called Google Tag Assistant, available here. This little extension will allow you to test any tags on your website by clicking the little icon in your browser task bar.
Resulting in a screen like the one below showing the results.
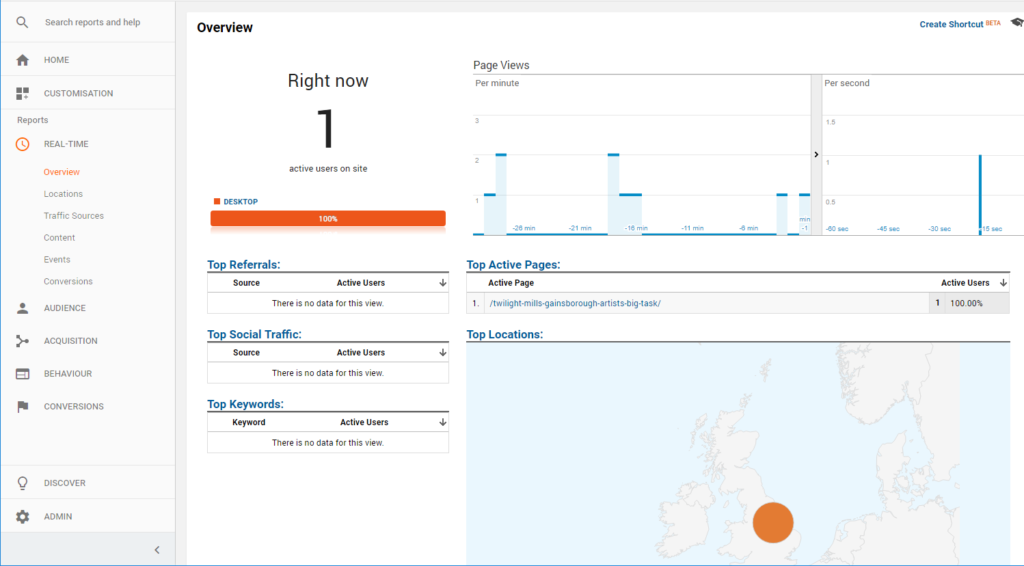
The second method is to view your analytics data in REAL-TIME, login to your Analytics account and select the relevant account then from the left menu choose REAL-TIME > Overview. View a page on your website and then you should see activity like that in the image below in your analytics.
That’s it you have implemented Tag Manager and created and verified you first Tag, watch out for further blogs covering other aspects of Tag Manager and how it can soon become a powerful tool in your arsenal.